The Gang of Five
The forum will have some maintenance done in the next couple of months. We have also made a decision concerning AI art in the art section.


Please see this post for more details.

Sony Vegas Tutorial

DarkHououmon

  • Member+
  • Littlefoot
  • *
    • Posts: 7203
    • View Profile
    • http://bluedramon.deviantart.com
I hope this is in the right section.

Anyway, I decided to do a tutorial on the basics of Sony Vegas. Sony Vegas is currently my video editor of choice. I switched to Sony Vegas after Windows Movie Maker gave me too many problems. I almost never experience problems in Sony Vegas.
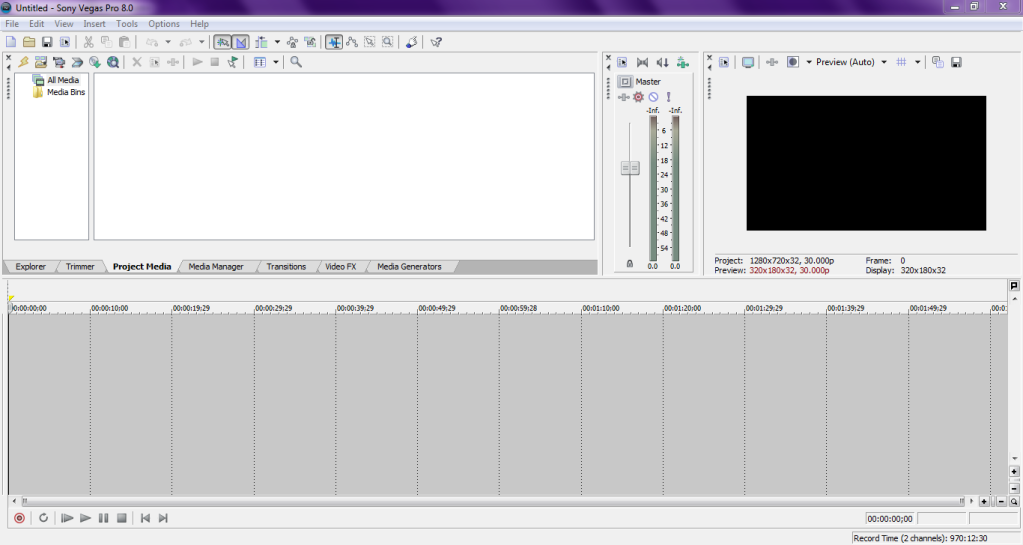


This is the mainscreen of Sony Vegas. Obviously if you try to use Sony Vegas after being used to Windows Movie Maker, you might be in for a bit of "culture shock", if that term applies here. Sony Vegas is very different than Windows Movie Maker and it can be difficult to get the hang of at first. But once you learn the basics and what certain things are, it becomes easy.

Instead of using the Trimmer, use the S key to cut a clip. And when speeding up or slowing down a clip, simply hold down Ctrl and use the cursor to click and drag the clip (making it smaller will increase speed and making it longer will slow down speed). And to make a clip fade in/out, move the cursor to a corner of the clip until you see a half-circle symbol and drag it over. And if you want to reverse a clip, simply right click and select Reverse.

Another thing to keep in mind is that Sony Vegas will not divide a clip for you. You must manual do it, which is easy. Simply drag in the clip you want to divide, use the S key to cut it into as many parts as you want, right click on each one, and select Create Subclip. Keep in mind, though, that you must not remove the original clip, otherwise the subclips will disappear.
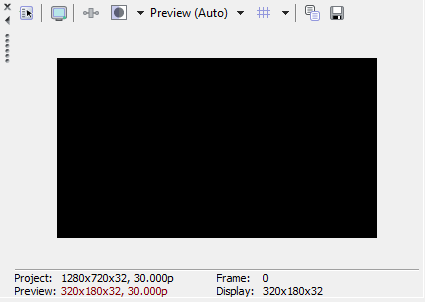


This is the preview screen. It will display whatever the marker in the timeline is on. You can resize the preview screen to be as small or as large as you want it to be. You can also use the symbol that's the furthest to the right to take screenshots of the video displayed in preview.


This is the master control volume. Changing the volume on this will effect all audio clips in Sony Vegas.


This is the timeline. This is where audio clips, video clips, media generators, and pictures will be placed.

Sony Vegas allows you to put in as many audio and video tracks as you want. Tracks are similar to Layers in Photoshop; changes you make to one track will not effect another track. Simply right click and click either Insert Video Track or Insert Audio Track. The tracks play a big part in being able to pull off more complex stuff than you ever could in Windows Movie Maker.


These are the controls to the timeline. You can use them to preview a video in the works, much like how Windows Movie Maker allowed you to do the same thing.


This is the time for the timeline. It can be used to measure time on certain points of clips and to see how long a video currently is.


This sidebar on the timeline, which you can get from dragging the left side over, allows you to control the opacity of the video and the volume of the audio.


These navigation tabs hold different features of Sony Vegas. I'll only talk about the ones I use. I currently use: Project Media, Transitions, Video FX, and Media Generators.
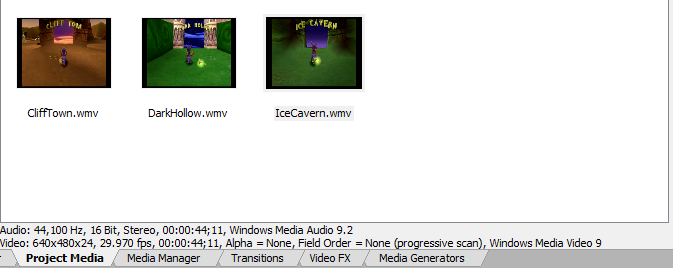


This is the Project Media area. All the stuff you import into Sony Vegas will appear in here. To use stuff from Project Media, simply click the item you want and drag it into the timeline.
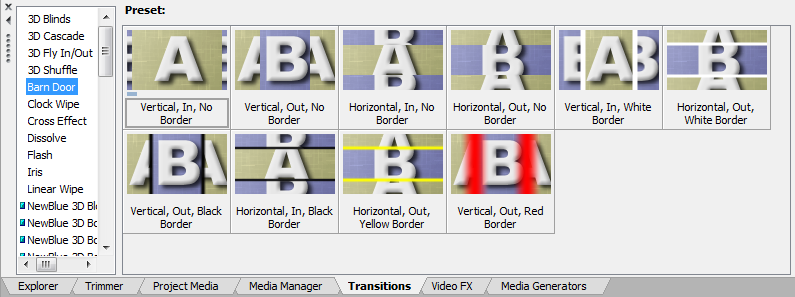


This is where the transitions of Sony Vegas are located.


DarkHououmon

  • Member+
  • Littlefoot
  • *
    • Posts: 7203
    • View Profile
    • http://bluedramon.deviantart.com


And this is where you'll find the video effects.


This allows you to put in different media generators, such as text and credits. You need to create separate video tracks for these to work properly.


Another way to add effects is to right click on a clip and select Video Event FX and select the effects you want and click OK.


These tabs, located near the top of the effects window, show you how many and what effects are currently in the selected clip. These will vary depending on what you have put into the clip.


If you right click and select Event Pan/Crop, you can zoom in/zoom out and move the picture around. You can also crop the picture. You can also rotate the picture.


When you change something in the effects, it will instantly reflect on the video so you can see how it will look. If you are not satisfied, you can keep making changes or cut out the effect entirely and use another one.


You can also make use of keyframes to "animate" the effects. Like in Flash, keyframes designate when a certain event happens and fills in the blanks between so you don't have to. Keyframes are another important factor in how to pull off complex stuff in Sony Vegas.


Here is what the video looks like when one keyframe is selected. Bear in mind this will vary depending on the effect and settings you chose.


And here is how it looks when the very next keyframe is selected. Like before this will vary depending on the effect and settings chosen. The video doesn't instantly change from the previous picture to this one; it's a gradual change. How gradual depends on how close the keyframes are to each other. The further apart, the longer it will take, and the closer they are the faster it will take.


DarkHououmon

  • Member+
  • Littlefoot
  • *
    • Posts: 7203
    • View Profile
    • http://bluedramon.deviantart.com


To use a basic transition, drag one clip over another. You can push it in or pull it out as far as you want to, depending on how long you want the transition to last. If you wish to use a more decorative effect, you can drag a transition from the transitions list (like you can with effects) and drag them between the two videos you want to overlay. Like before, you can drag them to make the transition last as long as you want it to. And like with effects, you can change how the transition will look.


Here is an example of what the video will look like after a transition has been applied. Once again, this will vary depending on what you have chosen.


Here is the text window, which gives you a lot of options on what to do with text you want to add. You can change font style, font size, color, location, add effects, etc.


Here is how the text would look like when no changes are made. This will change to reflect the changes you make in the text options.


Well that's it for now. If there's anything else you would like to know, let me know.


LBTFan13

  • Cera
  • *
    • Posts: 3364
    • View Profile
This couild really be helpful to somebody who is just starting to use Sony Vegas. Keep up the good work Kacie! ;)


Petrie.

  • Hatchling
  • *
    • Posts: 0
  • It's good to be the king!
    • View Profile
Woah....$$$$$$....down the drain. :o  Don't know if I could ever justify such an expense when Movie Maker is good enough for video editing I do (basically very very little).


landbeforetimelover

  • Member+
  • Littlefoot
  • *
    • Posts: 8495
  • Littlefoot
    • View Profile
    • http://www.thelandbeforetime.org
Sony Vegas is similar to Adobe Premier, but I prefer Premier because it has a lot more sophisticated options and it simplifies all the basics that you use all the time.  It does eat a LOT more memory though.  I'd recommend a minimum of 3gb just to make music videos.  If you're doing anything more sophisticated, I'd recommend at least 5gb.  But you really should try Adobe Premier Darkhououmon.  Just as a visual comparison, here's a snapshot of an older version of Adobe Premier Elements:


It's an older version.  The newest version of Premier is a LOT better.  But this one works just fine for my uses.  Also, this is Premier Elements, which is a stripped down version of Premier.  If you look at the newest version of the full Premier, it'll make you drool.  Unfortunately I don't have $800 to buy it.  I have an older version of both Elements and the full version, but Elements is only $70.  I got the older version of Elements from a garage sale. :smile


2007excalibur2007

  • Member+
  • Petrie
  • *
    • Posts: 710
    • View Profile
^

...what the hell is with all those ffdshow icons on the taskbar? :lol


Campion1

  • Member+
  • Ducky
  • *
    • Posts: 1069
    • View Profile
I never could figure vegas out. I might try it out now with the help of this thread. Thanks.


landbeforetimelover

  • Member+
  • Littlefoot
  • *
    • Posts: 8495
  • Littlefoot
    • View Profile
    • http://www.thelandbeforetime.org
Quote from: 2007excalibur2007,Aug 7 2010 on  06:00 PM
^

...what the hell is with all those ffdshow icons on the taskbar? :lol
It opens a new tray icon for every single file you open in Premier Elements.  I have no idea why I even had it installed.  For all your codec needs, just go download the DIVX player and just install the codec (not the player or converter, because those really suck).


DarkHououmon

  • Member+
  • Littlefoot
  • *
    • Posts: 7203
    • View Profile
    • http://bluedramon.deviantart.com
Setting Up Sony Vegas To Render In HD:

If you would like to set up Sony Vegas to render a video that will register as HD on Youtube, all you need to do is make sure that you have the following settings:


Also, here's a short video tutorial I did on Sony Vegas.


http://www.youtube.com/watch?v=ZnPCgdMTyJo

There's supposed to be music to it (I felt that a mute video would have been boring to watch) but YT hasn't finished processing the audioswap yet. Not sure how long it will take.